If you found this via Pinterest or visit for the first time: Don’t forget to subscribe to the blog if you want to use it. Subscribers get notified of new patterns via email. And of course you can just follow ResinRapture on Facebook. Thank you!
Note: Since a lot of patterns require the same basic techniques, I am not going to walk you through every step with every pattern. I don’t want to insult your sewing skills. But in case you are unsure how to go about it: Here is a short guide with some tricks and tips. I hope it helps to understand why I do certain things and how.
And now:
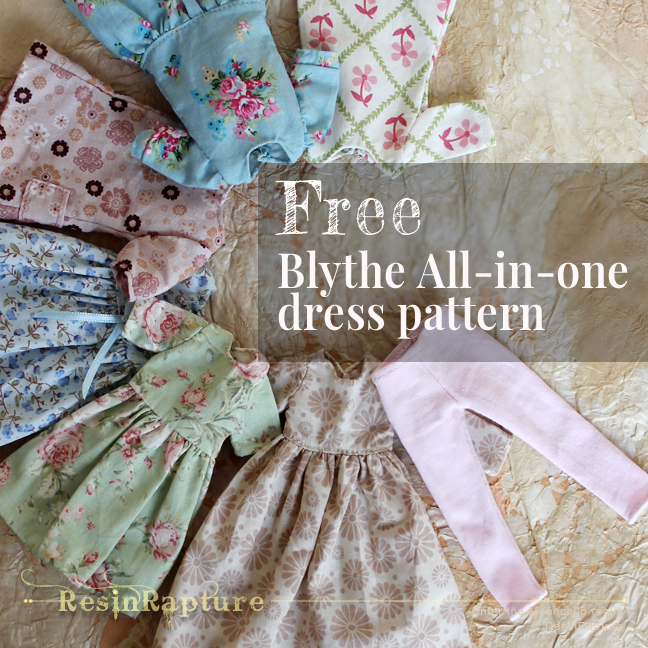
The hopefully ultimate all-in-one dress pattern…
The pattern is made to fit the Pure Neemo S body.
Make sure you print the PDF without automatic scaling.
Letter / DIN A4 PDF
Don’t forget to subscribe to the blog if you want to use it!
![]()
![]()
Tutorial
Ok, not all in one, but certainly a lot in one. I tried to design the pattern in a way that would allow you to use just a single pattern piece for a variety of dress forms and looks. Of course it’s up to you how you use it. And if you are a fan of a mass of tiny pattern pieces, print and cut as many as you like. But if you are like me and can’t remember if one out of twenty tiny pieces was for Barbie or Blythe and for what dress, I think you might like the idea of the all-in-one pattern. And since I hope you will get as much use out of it as I am, I’ll show you what I did to make it last.
As you can see in the first picture, I cut one half of the neckline high and one low, I just turn the pattern to draw the other half. And I cover the pieces with self adhesive clear film. I use kid’s felt pen to draw on fabric, it washes out easily and you can see it through the fabric, and with the film on the pattern I can just wipe it off.
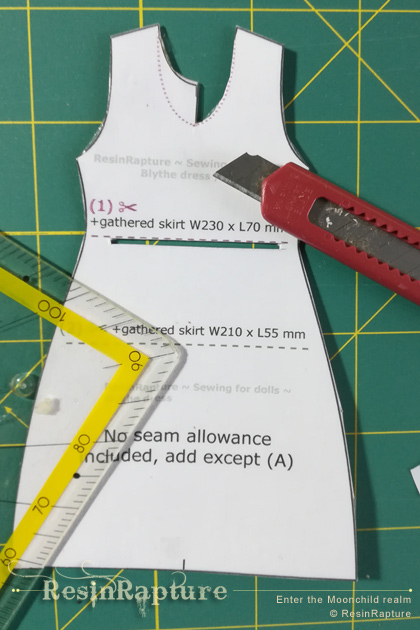
After that is done, I make tiny cut-outs where I want to draw the different top lengths. For an under-bust top I just don’t add sewing allowance to (1). To mark the sleeve lengths cut out darts are usually enough. Just use one of the straight edges as a ruler to connect the marks you made using the darts. The second sleeve piece is just for puffed sleeves, if you never make them you don’t need it.
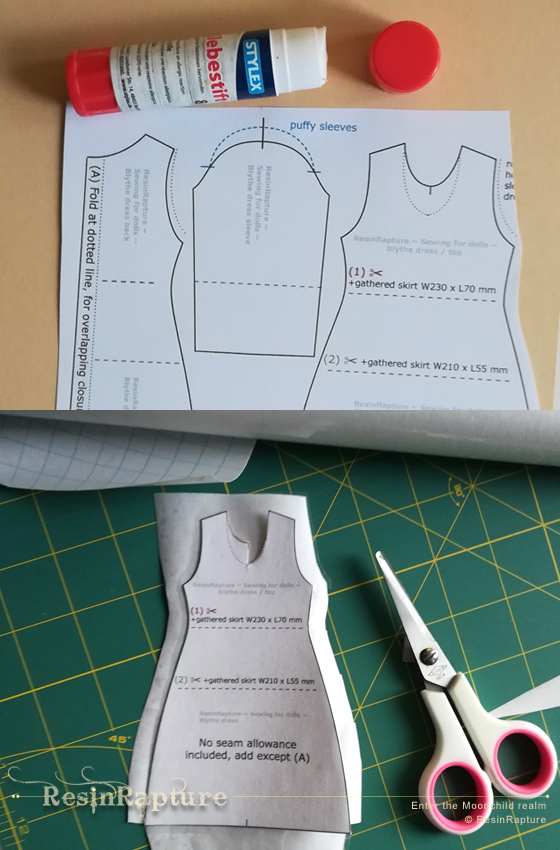
But in case you want to make puffed sleeves, here’s how to use the piece.
First you want to use it to draw your sleeve (add allowance). I am not a fan of gathers in the armpit, so we start gathering where the tiny blue marks are (1). It’s a lot easier to gather your sleeve if you use some masking tape to keep the fabric in place (2+3). I usually just use one strip to tape the fabric to the pattern piece, just below the point where I want to start with my gathering stitch. It’s just easier to see the position in the picture with the tiny strips.
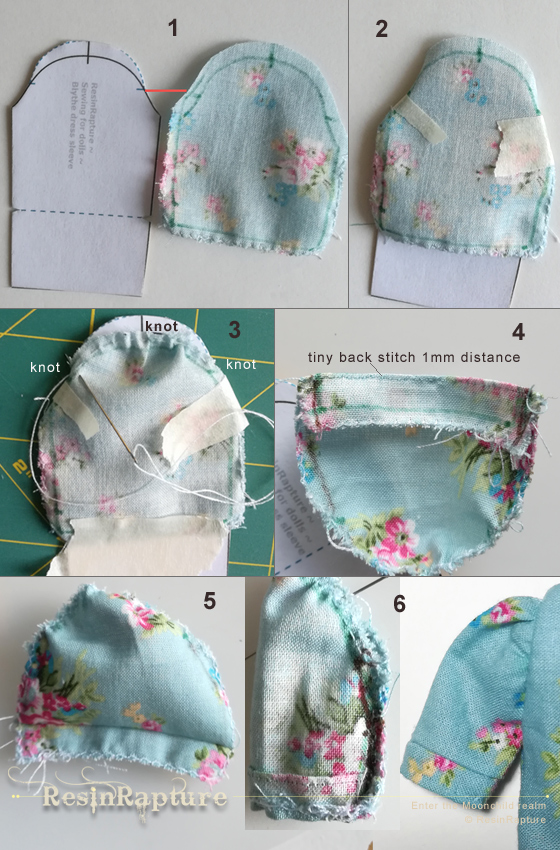
Start your gathering stitch at the mark and shove the fabric a bit down until you can see the black curved line. Press the middle of your fabric to the middle of the piece and push the gathers into place until they pull the fabric down (3). Just keep in mind that you work with allowance, the curve is approximately at the same height as your line on the fabric, not the edge of the fabric. Make a knot or a back stitch to keep the first part of the gathers in place. It’s hard to explain, but when you are actually doing it it’s quite obvious what to do. Same for the second half. Lock your stitch. You have now pre-gathered your sleeve and it will be much easier to fit it into the arm hole. You already know how to set the sleeves if you have read the guide with tips and tricks.
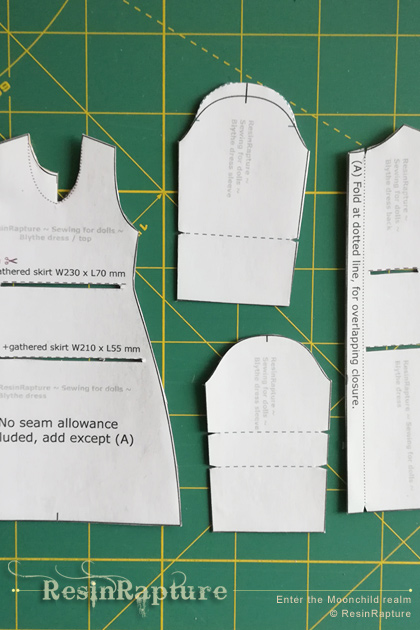
If you want a little cuff, make a fold and add a tiny seam just below the fold. Make sure the fold points up. Whether you make your cuff bottom seam now or after you closed the sides is up to you.
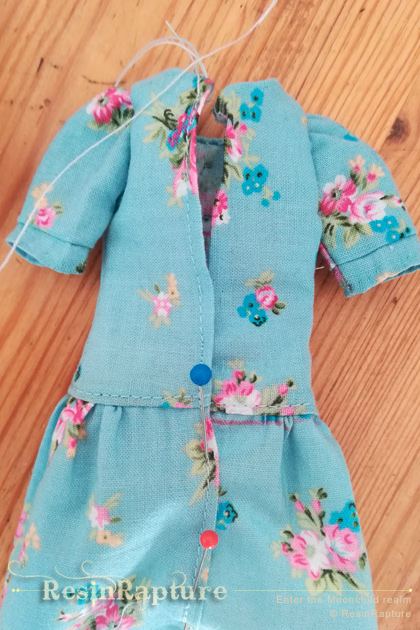
I am pretty sure you will have lots of ideas how to combine or alter lengths and parts, add collars or vary the skirt lengths. Just one last thing: The back part is designed to close overlapping. I fold back both pieces at the dotted line, add a top stitch and decide to either attach press buttons or close the dress skirt. I just place the folds on top of each other and sew up to the point where I want it to open. One press button at the neck is usually enough.
The suggested gathered skirt dimensions are just that: suggestions. I trust you are perfectly capable of cutting squares and didn’t bother to include them in the pattern drawing. If you want a half circle skirt, you can use this.
The possibilities for combinations are basically endless. You can use this pattern to make pinafore dresses, use your own preferred skirt length, play with embellishments and so on. If you do use it for a pinafore dress you might want to be generous with the allowance. Since it needs to fit over your basic dress, make the armholes wider and add to the sides. I hope you’ll have a lot of fun with this and will love it. And of course I’d love to see the results!
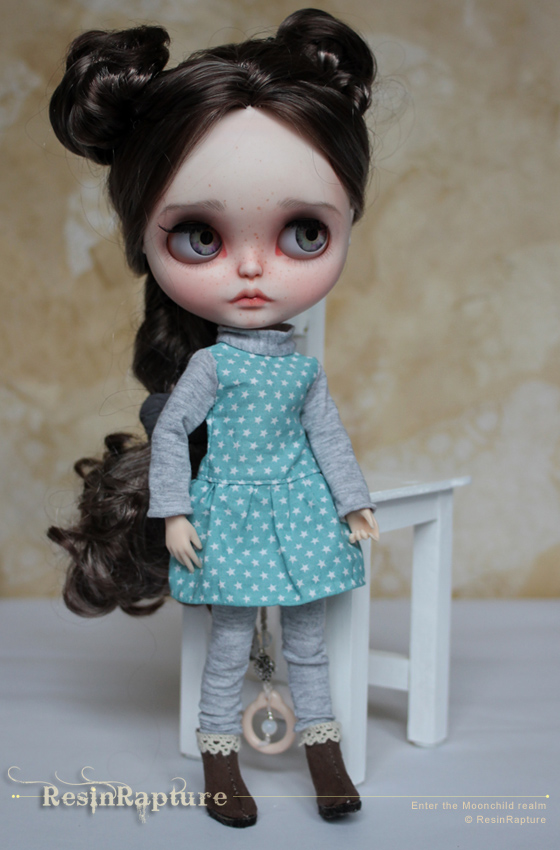
The leggings pattern is self explanatory, I guess. Don’t add sewing allowance for jersey or knit to the sides, maybe just a bit for the hem in the waist and the leg bottom, depending on how long you want them. My girls usually wear boots, so I like them a bit shorter. You don’t need to add elastic, just fold the hem back in the waist. And if you use the shirt pattern from the free Blythe overall pattern you can combine those two for PJs. For the shoes/ boots I’d like to point you to Making doll shoe soles the easy way. Sylvie is wearing the boots with the little trim at the top in the second picture.
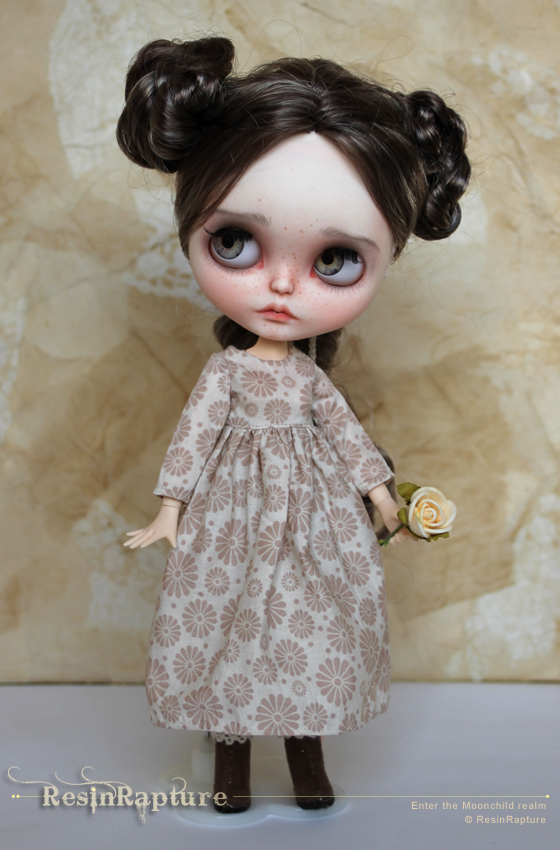
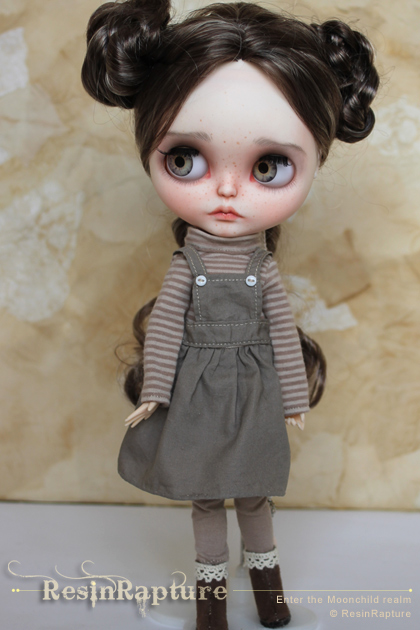
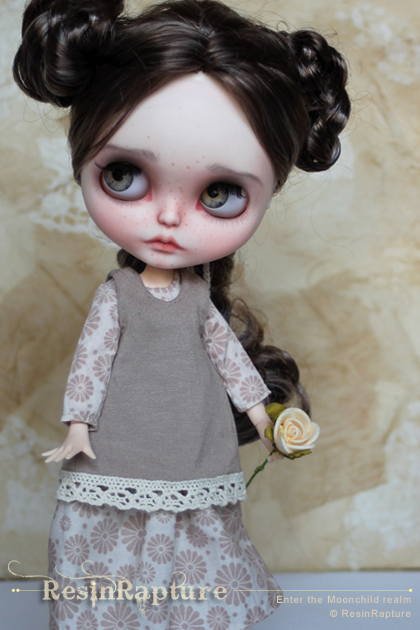
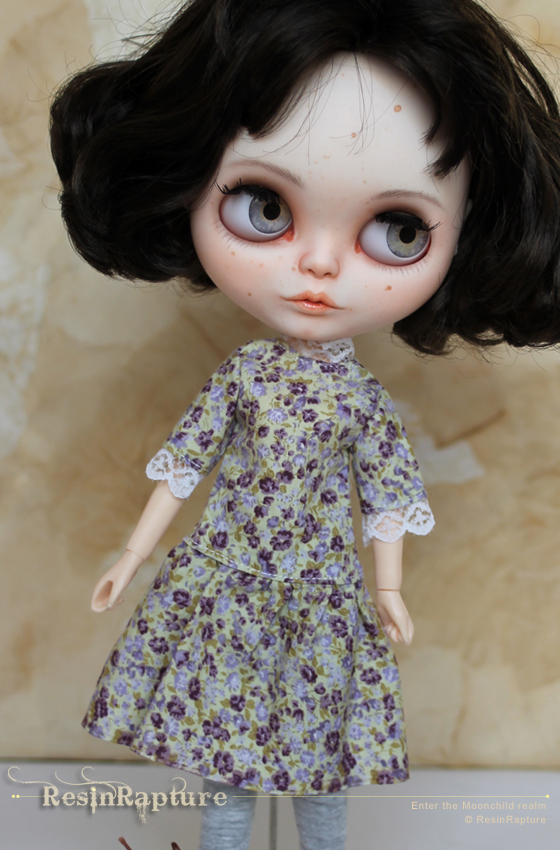
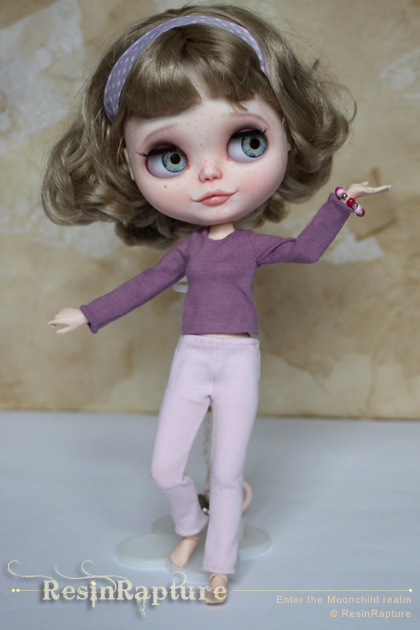
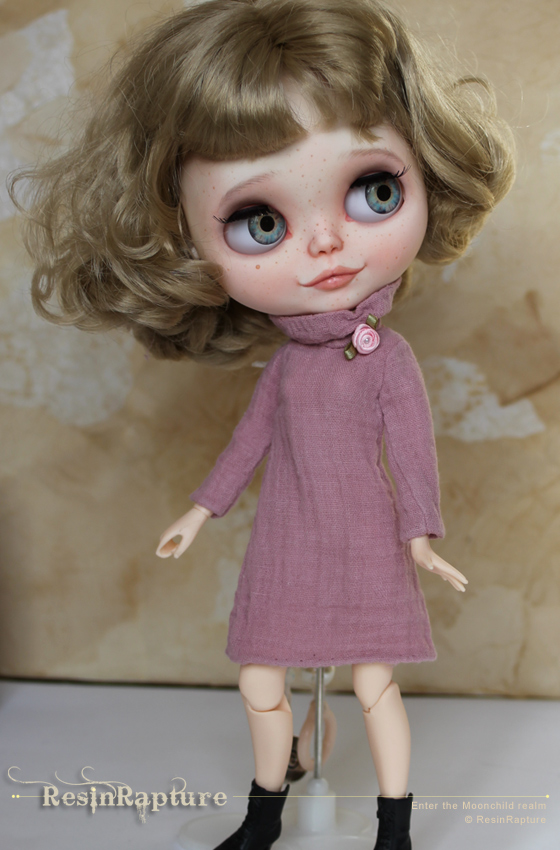
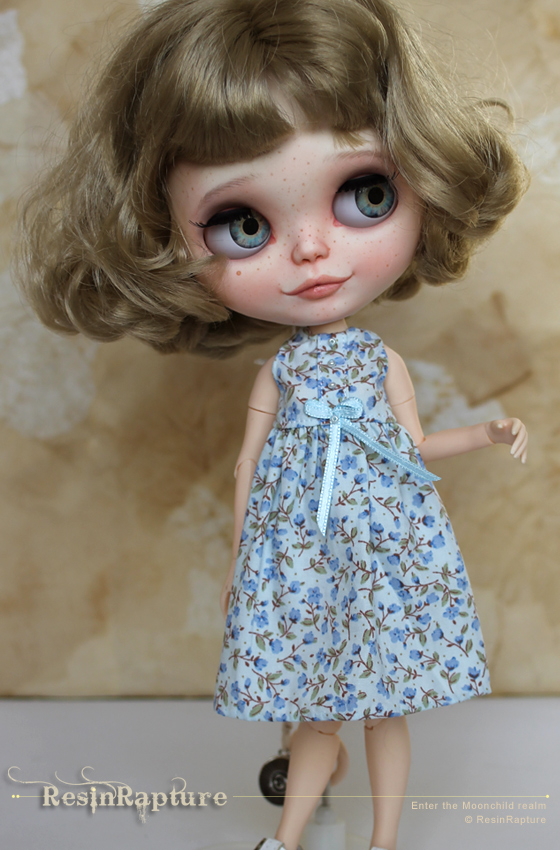
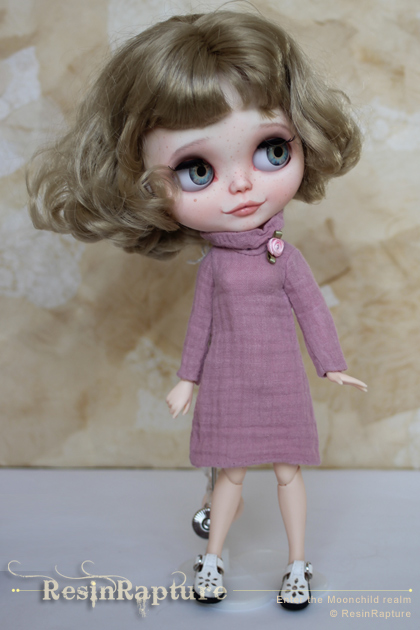
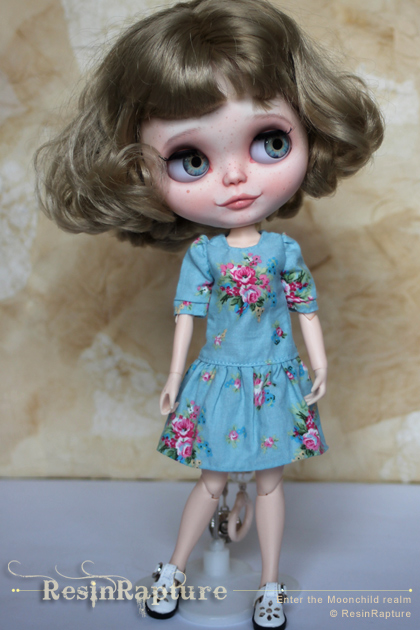
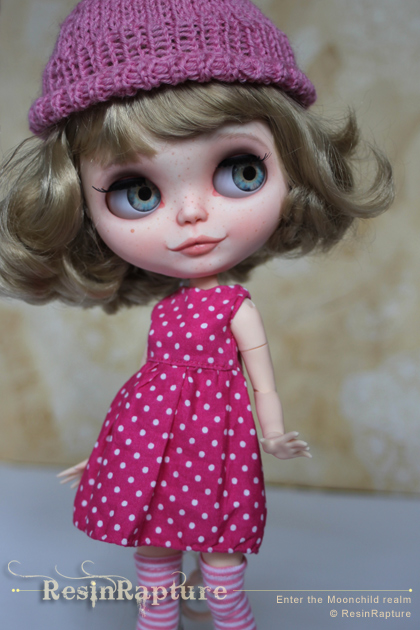
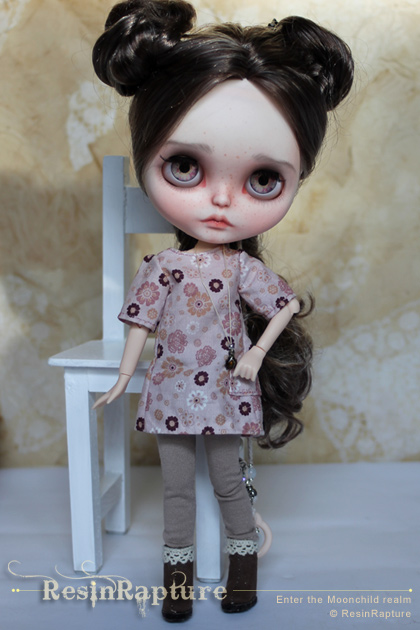
14 out of 100 variations
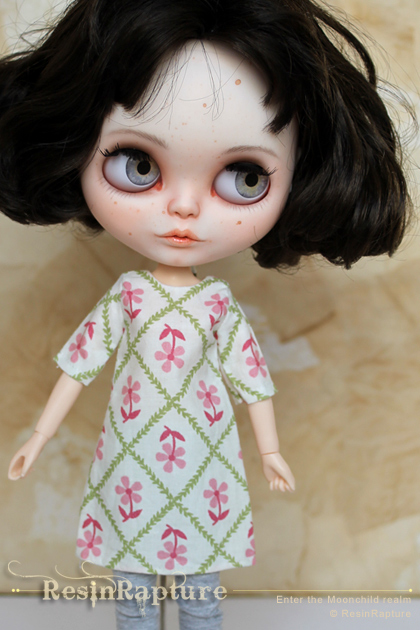
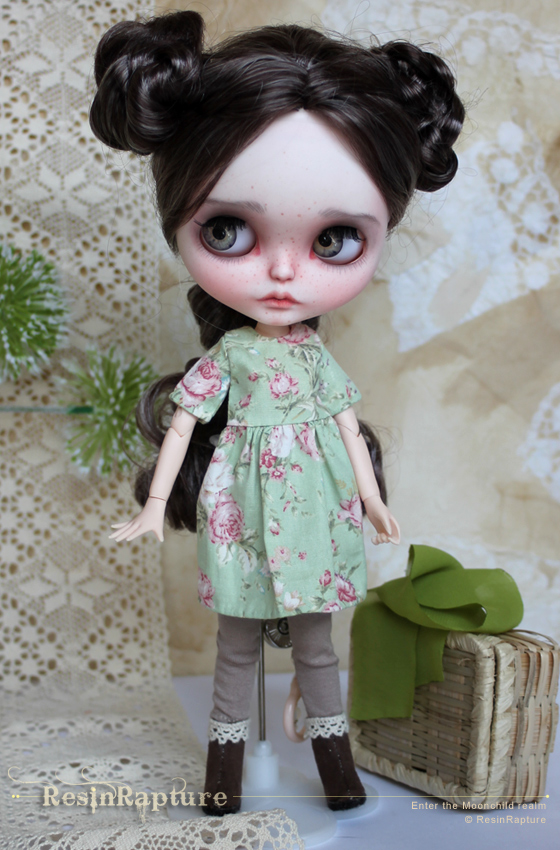
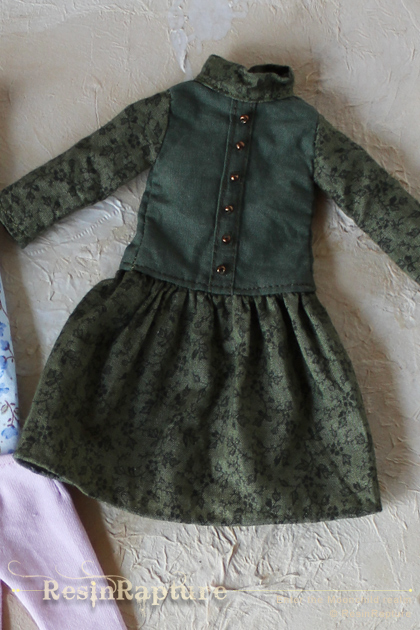
The following pictures show just a few of the many variations you can create with this pattern. The samples show the basic full dress form, and combinations of skirt and short top (1), long top (2) and tunic top (3). For the under-bust top I cut directly at the line without allowance. The last dress (green dress with button panel) on a doll. For this I added additional width (approx. 10 mm) in the middle for two tiny folds to create the panel.
How about matching eyes for your new dresses? Check out ResinRapture free eye template sheets!
I hope this was fun and your dolls will have a lot of cute dresses soon :). Don’t forget to subscribe to get notified of new posts. You can find all patterns I share in the sewing section of the blog.
And maybe you’d like to join the Facebook group I created a couple of days ago to show how it turned out?
Tag @resinrapture on your Instagram or join the sewing and creating Facebook group OneSixBackstage to show your work!
I very much hope the group will grow into a nice community of creative doll owners. Sales-free and for all those of you who sew and create for Blythe, Pullip, Momoko, Kurhn or other 1/6 scale fashion dolls. A lot of them can share clothes and the same patterns work for a lot of different dolls. Let’s figure it out together!
Here is the link to the Blythe&co sewing and creating group “OneSixBackstage” on Facebook.
You did it again! Thank you for sharing free patterns with us!
It was fun! And it’s addictive, as soon as I had finished one I had the next idea 😉
OHHH, This is one is awesome!!
Love this pattern, thanks so much for sharing <3
🙂 I am happy you like it!
It certainly is versatile, all your versions look lovely. The tips are also very interesting! At some point I would love to have a Momoko doll, and then I’ll know where to go for patterns. 🙂 Great work!
Thank you! I think Momokos have slightly longer arms. I thought about getting one, too. But I still have unpainted Mengfan dolls in the box, and I have to concentrate on other things for now. There’s someone who’s Momoko fashion pictures are all over Pinterest, the dolls look lovely in those dresses.
It’s very generous of you to share all your patterns Mia. The inspiration one gets from seeing all what you have achieved with a simple basic pattern is good for the sewers soul! 😘
Big hugs,
X
I love to see what other people create with it. Thank you 🙂
Thank you
You’re welcome. Have fun sewing!
Yes, making clothes for Blithe is very addictive and these wonderful patterns will feed my wonderful addiction.
Thank you. Have fun, I hope your girls will enjoy the results 🙂
Is there a way to print this pattern from and iPhone 11? Or can someone print it and mail it to me?
Maybe your phone’s user manual can give you an answer to the question how to print from your phone on a WiFi enabled printer? Or you could ask a friend with a different phone for help. I believe a copy shop would probably help as well.
Merci
Thank you. This is wonderful
Comments are closed.